Payment accounting/Payment
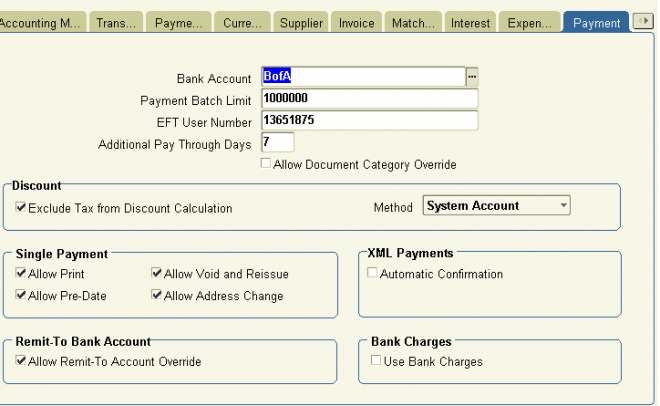
Bank Account: The internal bank account you use to disburse funds. Payables uses this value as a default in the Payment Batches window, and the Payments window.
Payment Batch Limit: The default maximum outlay amount Payables will pay for each payment batch. If a payment batch exceeds the maximum outlay, Payables displays a warning message that you are exceeding your maximum outlay, but allows you to proceed with the payment batch.
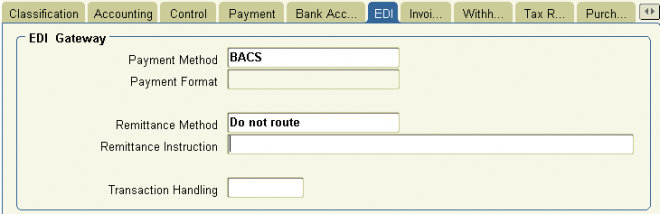
EFT User Number The number which identifies you as a user of electronic funds transfer services to your bank or clearing organization. Payables includes this information in some EFT payment formats.
Additional Pay Through Days Number of days between your regular payment batches. Payables uses the additional pay through days to determine the default Pay Through Date when you initiate a payment batch. For example, if you define 5 as the value in this field, Payables adds 5 days to the system date to calculate the default Pay through Date when you initiate a payment batch.
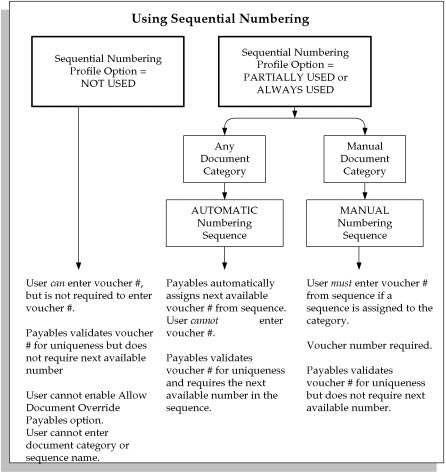
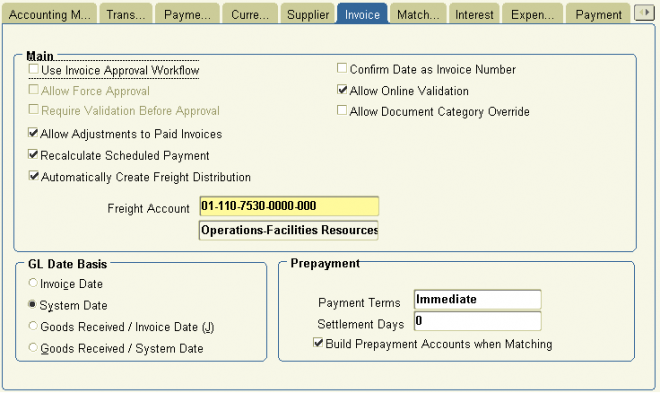
Allow Document Category Override Enable this option if you want to allow users to override the default document category assigned to a payment document by Payables. If your Sequential Numbering profile option is Partially Used or Always Used, Payables automatically assigns a document category to a payment document when you define a payment format for the payment document. Payables predefines a document category for each payment method. Your system
administrator can define additional document categories for a payment method. You can then use these additional document categories to override the default document category for a payment document, only if you enable this Payables option.
If your Sequential Numbering profile option is set to Not Used, Payables does not assign a document category to a payment document and you cannot enter a value in this field. Payables also does not allow you to enter a document category for a payment.
Exclude Tax From Discount Calculation If you enable this option, when you enter an invoice, and if you use Header level tax calculation, Payables subtracts the tax amount from the invoice amount when it enters the invoice amount applicable to discount in the Invoices window. If you enable this option, you cannot select Prorate Tax for your Discount Distribution Method Payables option. Note that even if you enable this option, taxes with corresponding offset taxes, such as VAT taxes, will not be excluded from discount calculation.
If you do not enable this option, Payables uses the gross amount (including the tax amount) of an invoice as the invoice amount applicable to discount. When you enter an invoice you can always override the default invoice amount applicable to discount.
Discount Method The method you want Payables to use for distributing the discounts you take when making payments.
If you leave this field blank, Payables uses the System Account method for distributing your discounts.
Prorate Expense: Payables automatically prorates any discounts across all the invoice distributions. Payables assigns the
discount to the charge account unless the invoice is matched to a purchase order with Accrue on Receipt enabled, in which case it is assigned to the price variance account.
If your Exclude Tax From Discount Payables option is enabled in this window and you enable this option, then the discount is prorated only to the expense lines and not the tax lines.
Prorate Tax: Payables automatically prorates a percentage of the discount amount across the tax distributions. Payables only prorates the percentage of discount amount equal to the percentage of your tax distributions. Payables credits the
remaining discount amount to the Discount Taken account you enter in the Financials Options window.
For example, if your tax distributions are 10 percent of the total invoice amount, Payables prorates 10 percent of the discount amount across the tax distributions. Payables credits the remaining 90 percent of the discount amount to the Discount Taken account.
You cannot select Prorate Tax if your Exclude Tax From Discount Payables option is enabled in this window.
System Account: Payables credits all discounts to the system Discount Taken account you define in the Financials Options
window. If you enable Automatic Offsets, and you want to have Payables distribute Discount Taken amounts across balancing segments, choose this method.
If you enable the Use Bank Charges option in the payment region, the Discount Distribution Method defaults to System
Account and you cannot update it.
Allow Print: If you enable this option, then you can print Quick payments. You print a Quick payment by selecting the Print Now option in the Payment Actions window.
Suggestion: If you are going to print Quick payments, you may want to have a fast, dedicated concurrent manager queue
and a dedicated printer with checks ready to print.
Allow Pre–Date: If you enable this option, Payables allows you to create payments with a payment date before the system date for any payment except a manual payment.
Allow Void and Reissue: If you enable this option, you can reissue a Quick payment. You may need to reissue a check for a Quick payment if it is spoiled during printing. When you reissue a check, Payables voids the old check and creates a replacement check. The checks are identical except that the new check has a new check number, payment date, and payment exchange rate if you are using multiple currencies.
You cannot select the Void and Reissue option for future dated payments.
Allow Address Change Enable this option if you want to allow users to address a payment to an address other than the invoice’s supplier site’s address.
XML Payments Automatic Confirmation Enable this option if you use the XML Payments feature and want the system to automatically confirm payment batches that generate Process Payment Request XML messages. If you enable this option, then when your system receives a Confirm Business Object Document XML message from your bank that indicates that the XML payment transmission was successful, the system automatically confirms the payment batch that generated the
payment XML message. When the system automatically confirms a payment batch, the user who formatted the payment batch receives a workflow notification that the payment batch was confirmed.
Allow Remit–to Account Override: Check this check box if you want to allow users to change the default primary supplier site bank account during Quick payment and payment batch creation. If you enable this option, you can override the Payables default of the Remit–to field of the Payments window and the Modify Payment Batch window. You can then select an alternate Remit–to account from a list of the supplier site’s active bank accounts that use the same payment currency. If you do not enable this option, you can override the Remit–to Bank Account only in the Scheduled Payments window.
Use Bank Charges: If you want to use the Bank charge feature, enable this option.
If you enable this option, you must enter a value for the Bank Charge bearer field in the Supplier region of the Payables Options window. Also, if you enable this feature, Payables will enter System Account as the value for the discount distribution method field in the Payment region of the Payables Options window, and you cannot override this value.
If you enable this option, you cannot take discounts on invoices.
Account For Payment
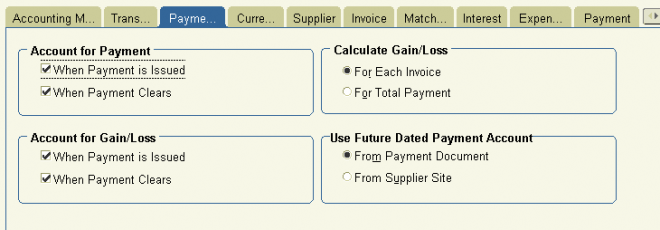 Choose when you want to create payment accounting entries. You can select one or both options.
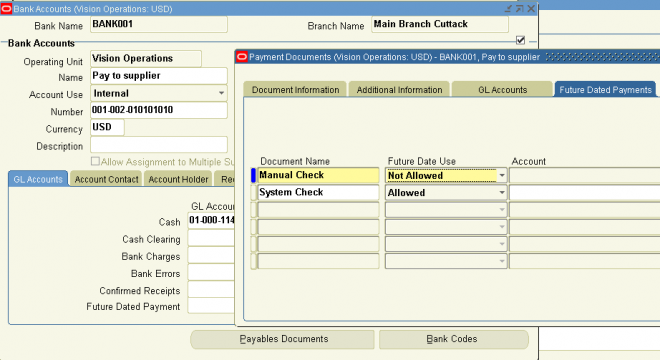
Payables creates the following accounting entries, depending on how the Account for Payment option is set. This accounting assumes you use accrual basis accounting. You specify the GL accounts when you define the payment document. Any accounting entries for gain and loss are controlled by the Account for Gain/Loss Payables option, so they are not included here.
I. Both (When Payment is Issued, and When Payment Clears):
Payables accounts for each payment you issue twice—once as an unreconciled payment and once again as a cleared payment. If you select both options you have the same functionality as the Allow Reconciliation Accounting option provided in previous releases.
Payables creates the following accounting entries after payment issue:
1. unreconciled payment: debit the AP Liability account and credit the Cash Clearing account
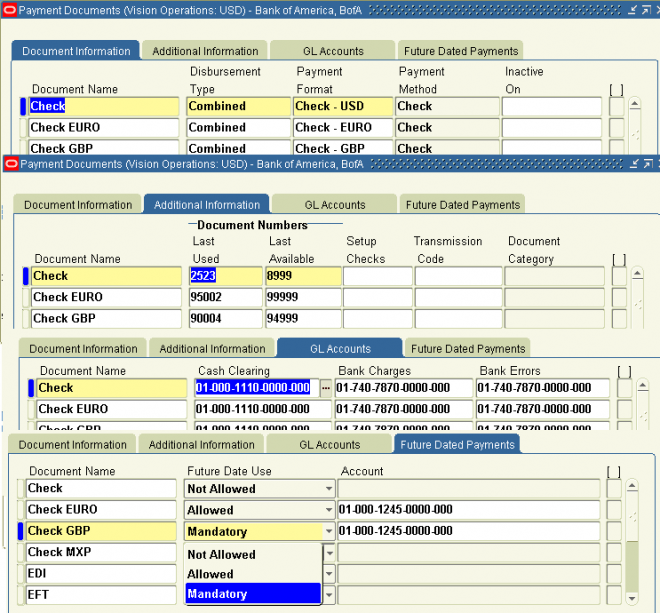
For future dated payments, debit the AP Liability account and credit the Future Dated Payment Account. Then, at payment maturity, debit the Future Dated payment Account and credit the Cash Clearing account.
2. Payables then creates the following accounting entries after payment reconciliation or clearing in Cash Management:
2.1 reconciled payment: debit the Cash Clearing account and credit the Cash account
2.2 bank charges: debit the Bank Charges account and credit the Cash account
2.3 bank errors: account in Cash account and Bank Errors account. Debits and credits depend whether the bank error was a positive or negative amount
II. When Payment is Issued: Payables accounts for each payment once, after payment issue. After you issue the payment, Payables creates the following accounting entries.
- unreconciled payment: debit the AP Liability account and credit the Cash account.
For future dated payments, debit the AP Liability account and credit the Future Dated Payment Account. Then, at payment maturity, debit the Future Dated payment Account and credit the Cash account.
Although you can reconcile the payment in Cash Management, Payables does not create accounting entries for payment reconciliation, bank charges, or bank errors, or gain and loss at reconciliation.
III. When Payment Clears If you select only this option, Payables accounts for each payment once, after clearing. After you clear the payment in Oracle Cash Management, Payables creates the following accounting entries.
– reconciled payment: debit the AP Liability account and credit the Cash (asset) account.
– bank charges: debit the Bank Charges account and credit the Cash account.
– bank errors: account in Cash account and Bank Errors account. Debits and credits depend whether the bank error was a positive or negative amount.


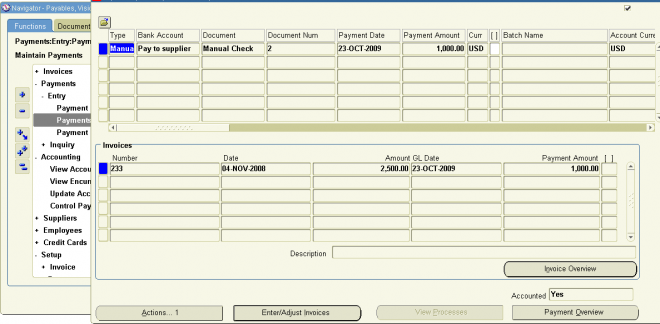


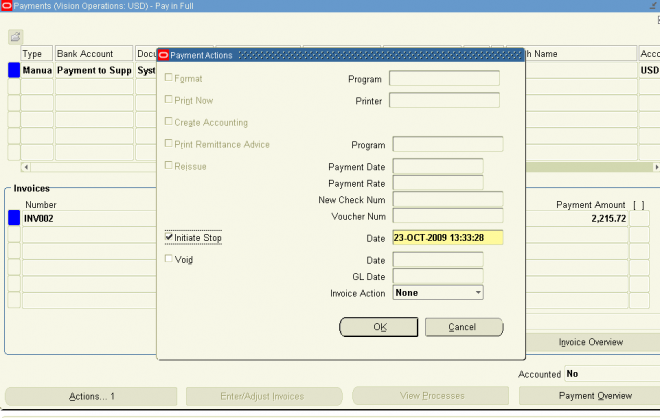
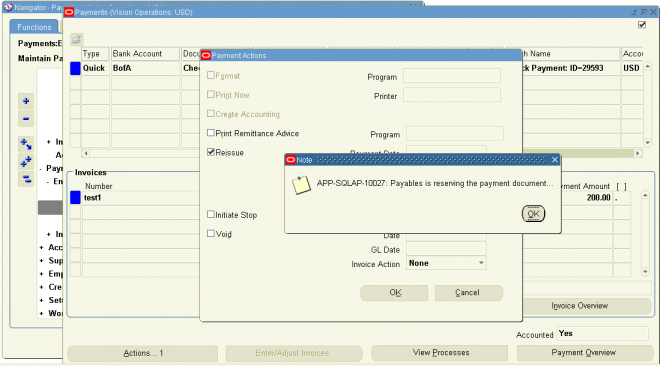
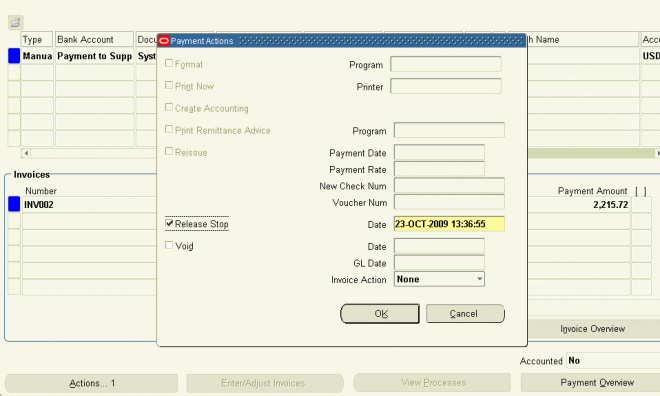 (N) Payments—>Entry—>Payments (B) Actions